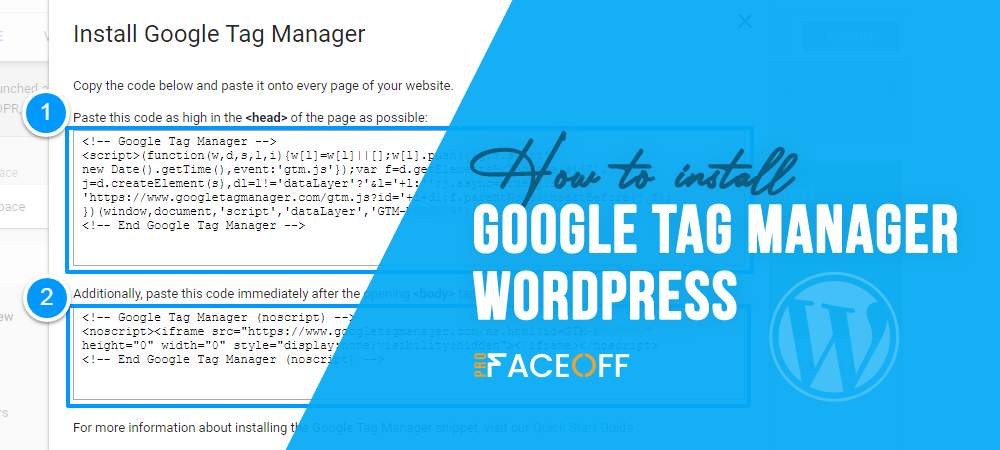
Google Tag Manager is a free tag management system that allows you to track traffic, conversions, and other site performance statistics.
It consolidates your marketing tools’ tags into a single, centralized dashboard without modifying the code. This helps you easily manage and preview all tracking tags before pushing them to your WordPress website.
Struggling with how to install Google Tag Manager WordPress? We’re here to help.
This article will walk you through 3 simple steps to install Google Tag Manager on your WordPress site. We’ll also recommend the 5 best Google Tag Manager plugins in case you don’t want to do this manually.
Let’s dive in!
- Benefits of Google Tag Manager
- How to Install Google Tag Manager in WordPress without Plugins
- 5 Best Google Tag Manager Plugins for WordPress
Benefits of Google Tag Manager
Without a centralized system, it will be challenging to maintain all the site’s tags. For instance, when updating the tags, you’ll have to modify various code snippets, which seems to be quite overwhelming for beginners. This is also not recommended by professional coders.
Furthermore, adding too much JavaScript to site files can make your website slow down and cause security risks. This will be even worse if you apply tags from untrustworthy sources.
Integrating Google Tag Manager into a WordPress site benefits you in many ways:
- Time Saving for Developers: You don’t have to code each tag manually. You instead generate all of your tags using the UI. Then the Tag Manager will apply them to your website. This gives you more time to do what matters, including managing your site content.
- Fewer Errors: Manually coded tags are more prone to errors. A simple copy and paste error or typo will make a tag invalid. Fortunately, you can solve these problems thanks to Google Tag Manager’s user-friendly error checking.
- Marketing Control & Oversight: It is considerably simpler to manage and track all of your tags using Google Tag Manager. As it supports both built-in and third-party tags, you can track activity across all websites and applications without effort.
Additionally, it allows unlimited tag creation using custom HTML. You can create and use tags to gather different website analytics data such as conversions, page visits, social shares, etc. This helps you build and develop strong marketing strategies.
- Free Tool: It includes many essential functions and they don’t cost you a penny. To use more advanced features and functions, consider installing the premium version.
How to Install Google Tag Manager in WordPress without Plugins
Step 1: Set Up an Account
To get started, you need to set up a Google Tag Manager account.
- Go to Google Tag Manager website, hit on the Start for free button to sign up.

2. Sign in with a Google account. If it’s a company account, use your company email address.
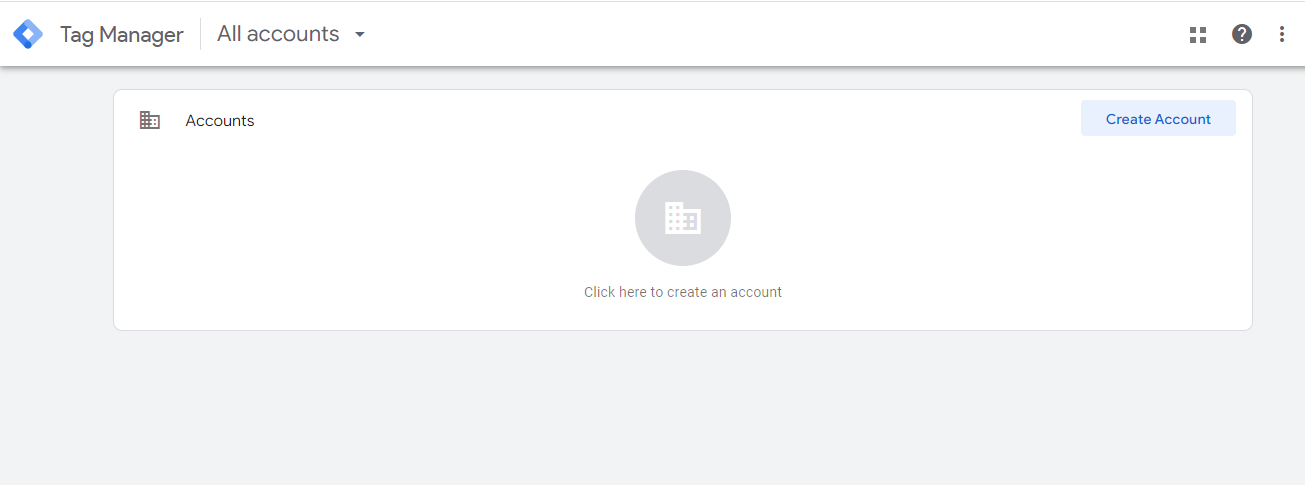
3. In the Accounts section, select the Click here to create an account or the Create Account button in the top right corner.
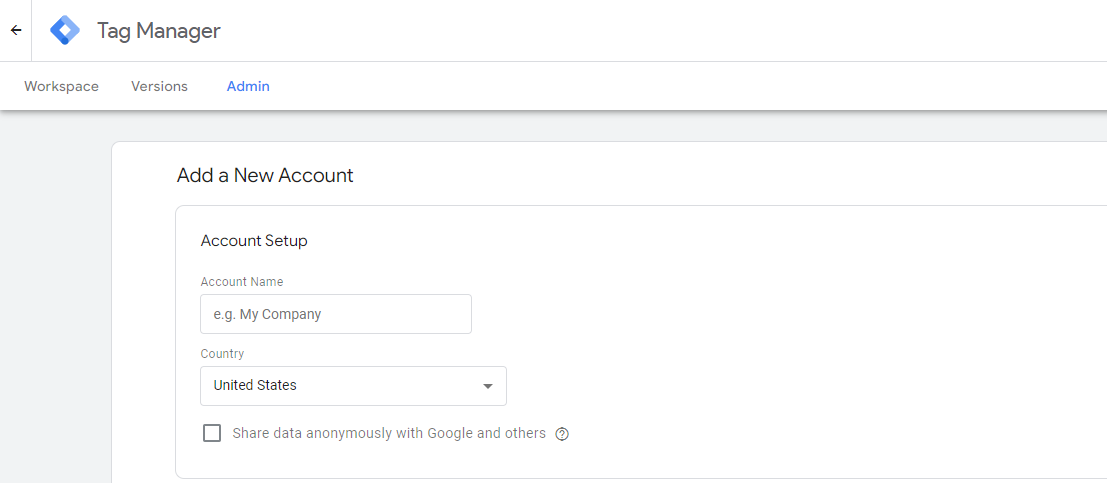
4. You then have to insert some important information. In the Account Setup section, add an Account Name and your Country. If it’s a company account, use your company name as the account name.
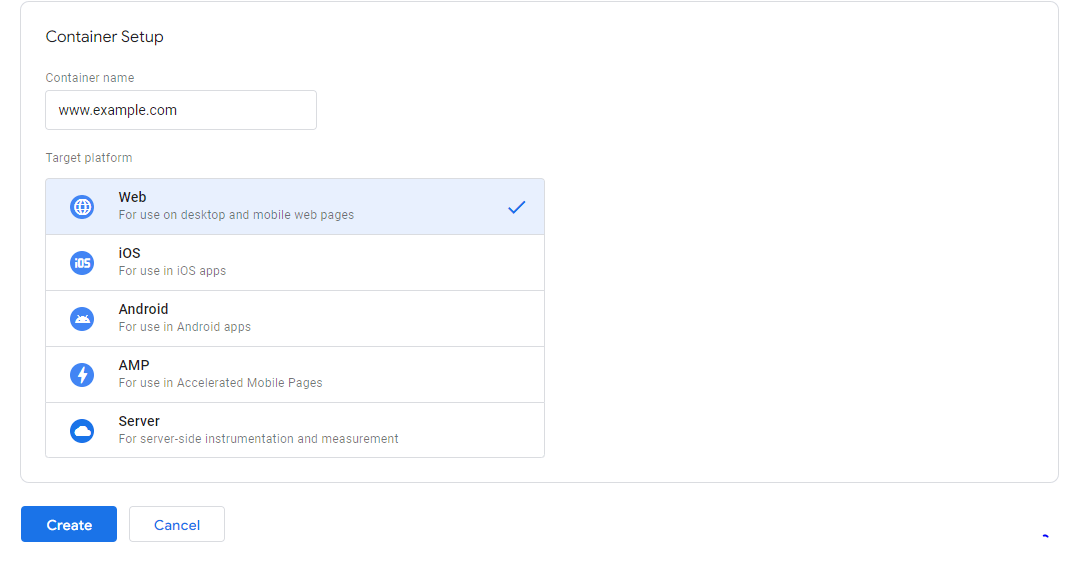
Complete the Container Setup section below the page. The container refers to a piece of code you must add to your web pages for Tag Manager to work. The Container name would be your WordPress website name.
At the Target platform options, select Web → Create.
5. Two popups will appear. In the first popup, simply tick the box I also accept the Data Processing Terms as required by GDPR.
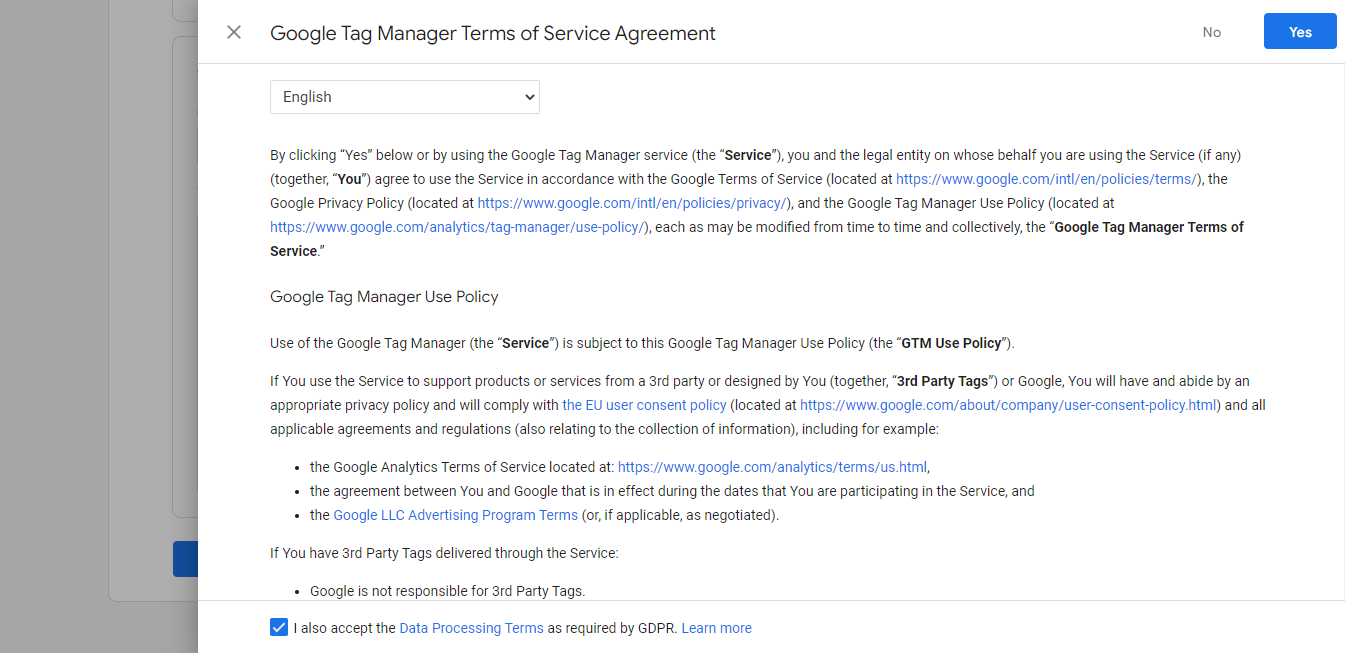
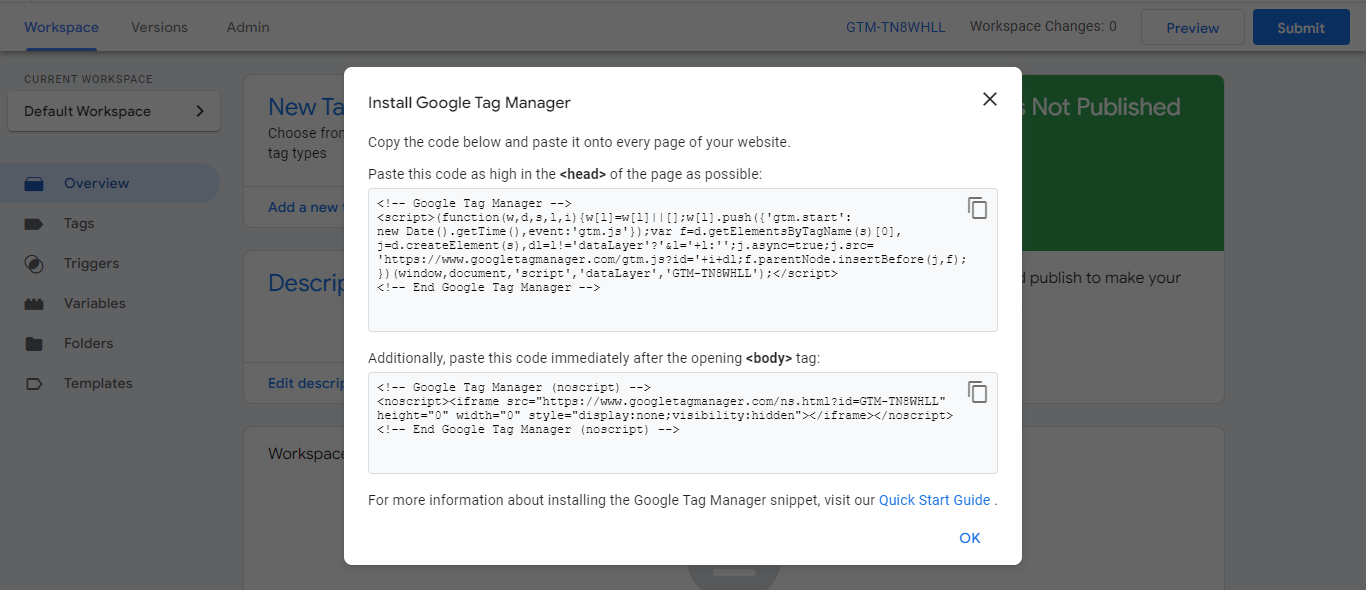
The second popup displays all the details of the container snippet you need to add to your site’s pages.
Step 2: Add Google Tag Manager to WordPress
Your Google Tag Manager account is now ready, you then have to add Google Tag Manager to your WordPress website.
At this stage, you must copy the code snippets from the previous step and add them to the <header> and <body> sections. Take the following steps:
- In your WordPress admin dashboard, go to Appearance → Theme File Editor.
- Open header.php in the Theme Files section.
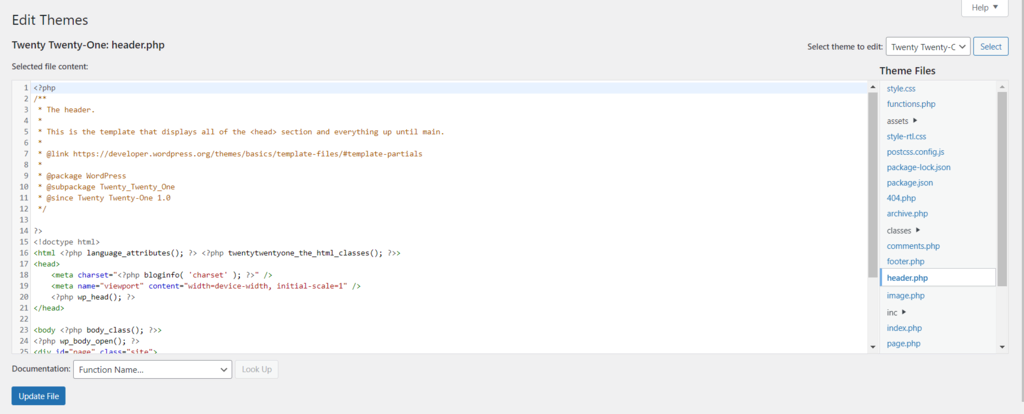
3. Copy the first part of the code snippet from the Google Tag Manager tab. Then navigate to the WordPress tab and paste the code immediately after the opening <head> tag.
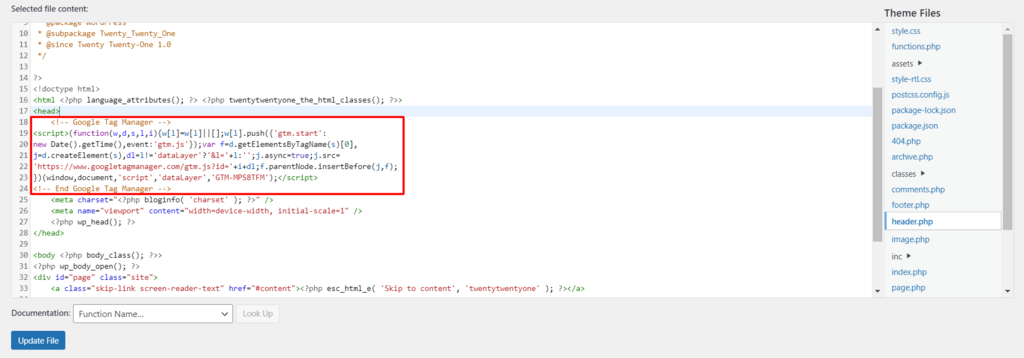
4. Similarly, copy the second part of the code and paste it right after the opening <body> tag.
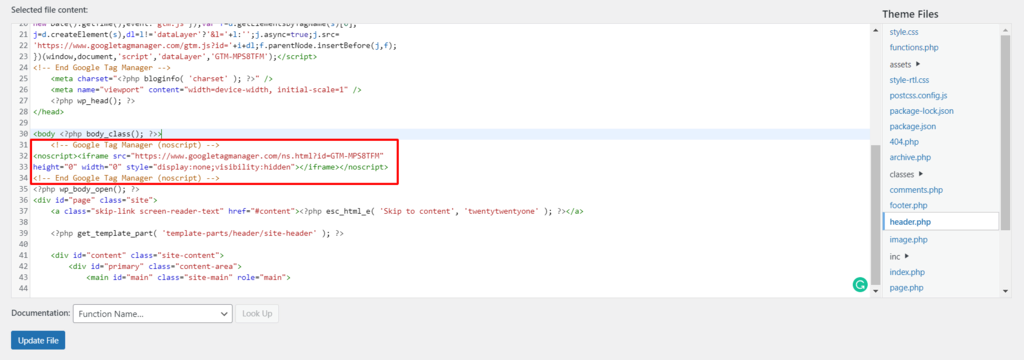
5. Hit the Update File button to finish.
Your WordPress website now has Google Tag Manager successfully installed, which you can use to add any tracking code.
Step 3: Publish a New Tag
There are various things you can do with Google Tag Manager, including adding and publishing new tags on your site.
Let’s work through the process step-by-step.
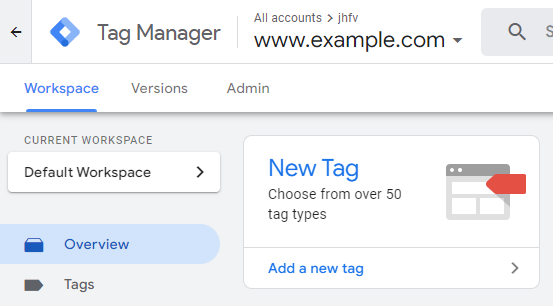
- Click on the Add a New Tag link from the Google Tag Manager workspace.
2. A new page will appear. Firstly, rename your tags however you like.
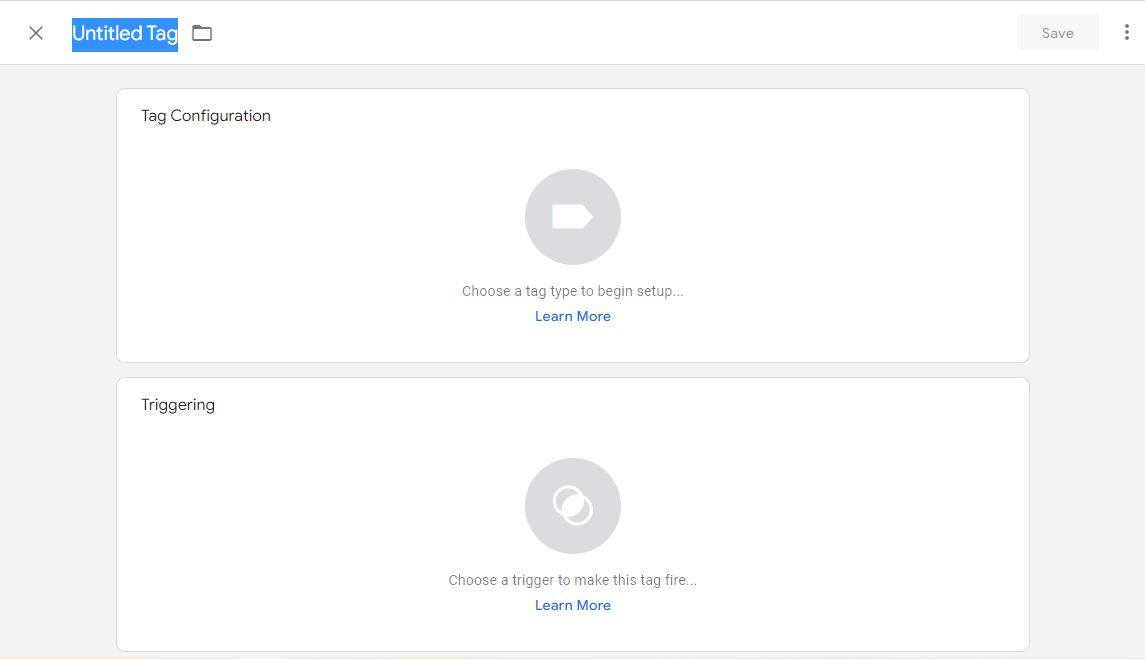
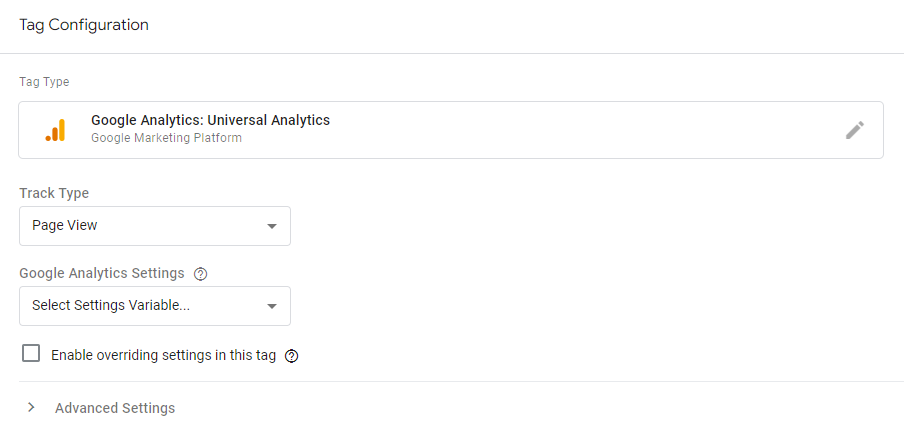
3. At the Tag Configuration section, hit on the icon Choose a tag type to begin setup. Select the configuration for any additional platforms or analytics tools that you want to integrate with your website. Let’s say Google Analytics.
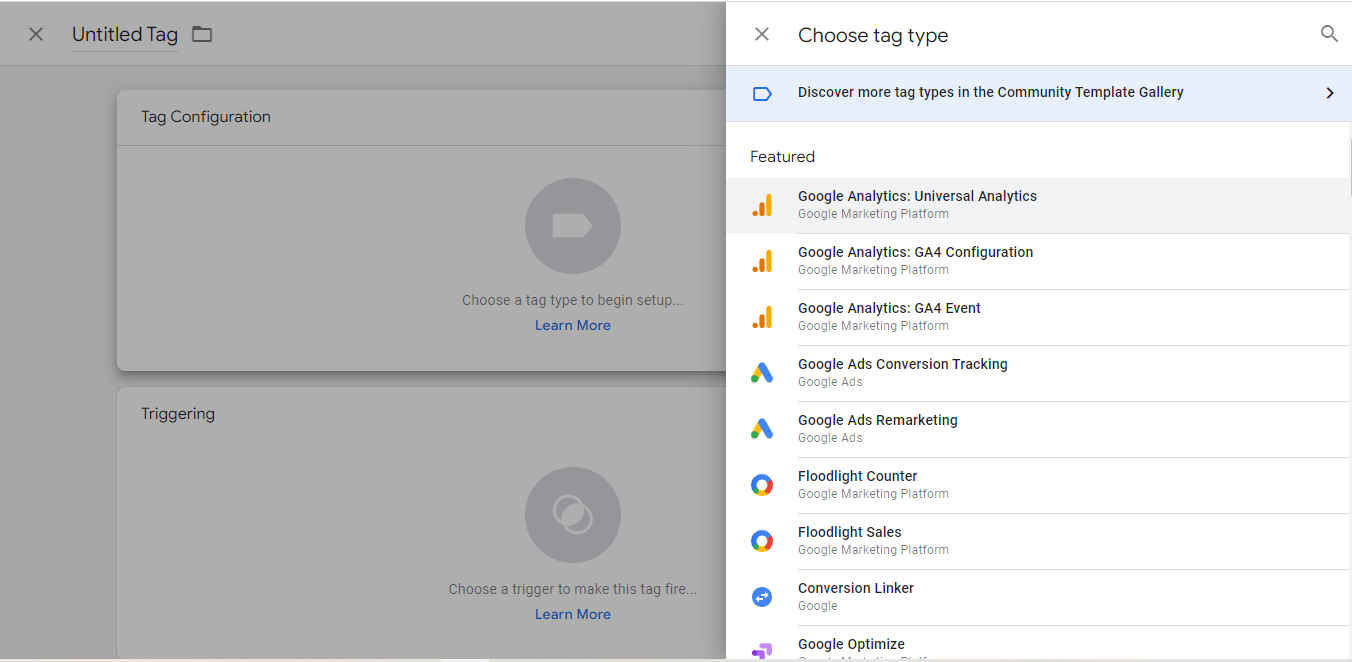
4. Choose a Track Type. Then, enter your Google Analytics tracking ID by selecting the New Variable option at the Google Analytics Settings.
5. Next, select the icon Choose a trigger to make this tag fire.
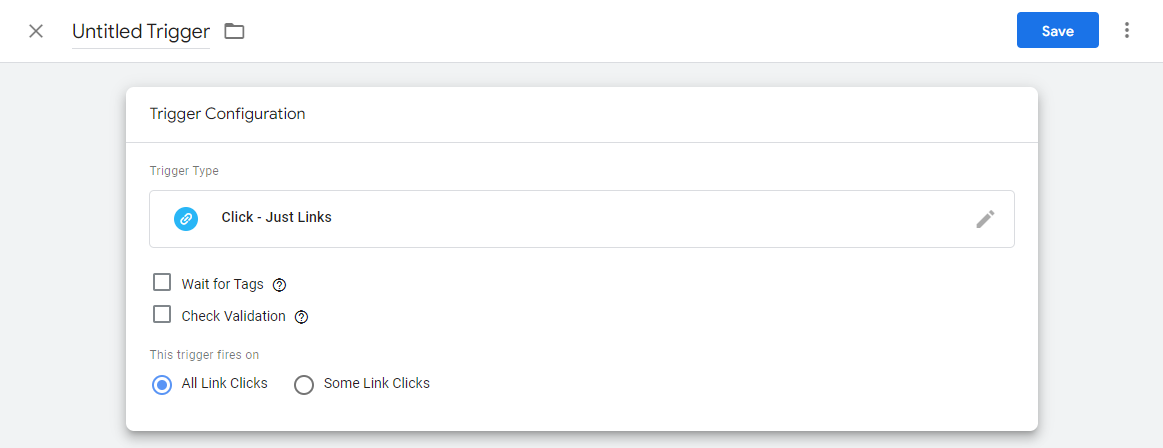
6. A new page will appear. Similarly, rename the trigger and click on the icon Choose a trigger type to begin setup. Then, choose your desired trigger options.

7. At the Trigger Configuration section, tick All Link Clicks. Then, press the Save button.
8. Next, on the Google Tag Manager dashboard’s Workspace tab, click the Submit button to submit your newly created tag.

9. Finally, select Publish and Create Version. Fill out the Version Name field with the tag name and select Publish.
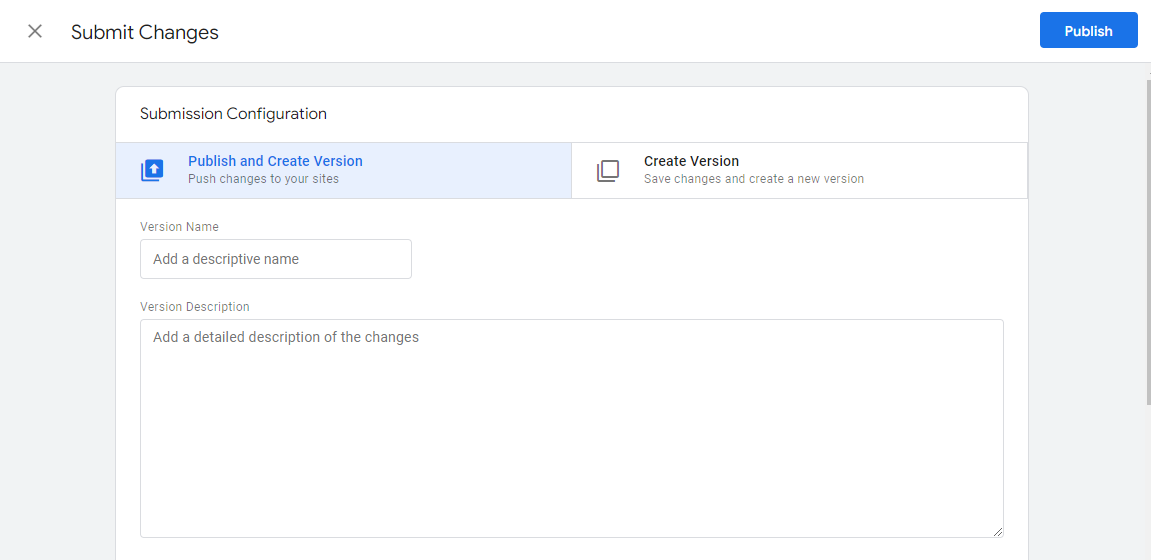
A new Google Analytics tag has been successfully created on your WordPress site with Google Tag Manager.
5 Best Google Tag Manager Plugins for WordPress
Another way to add Google Tag Manager to your WordPress site is using a plugin. This method requires less coding effort and therefore is more suitable for new users.
Here are our recommendations.
#1 Tag Manager

Plugin Stats:
- Price: 100% free
- Rating: 4.9 stars
- Active Installations: 10,000+
If you prefer to use a tag manager without writing any code, the Tag Manager plugin will come in handy. It supports many Google platforms such as Google Tag Manager itself, Google Analytics, Facebook Pixel, AdSense, etc.
The Tag Manager is so easy to use, especially for new users. This plugin allows you to add codes to your website on the header section, the footer section, or on the entire post.
#2 Google Tag Manager For WordPress

Plugin Stats:
- Price: It’s available for free on WordPress.org. If you own a large company and need unlimited workspaces for concurrent tagging projects, use the Tag Manager 360 pack.
- Rating: 4.8 stars
- Active Installations: 600,000+
If you want to deploy Google Analytics and marketing tags on your website automatically, use the Google Tag Manager for WordPress plugin.
It places the Google Tag Manager container code snippets onto your site so that you do not need to add this manually. This plugin also supports multiple containers.
Also, integrating with Google and other third-party tags makes it quite simple to use and manage your site. It is also time-saving and cost-effective as it authorizes you to easily detect any errors.
What’s more, it’s possible for your team to collaborate using workspaces and access restrictions.
#3 Google Tag Manager
Plugin Stats:
- Price: Free
- Rating: 4.2 stars
- Active Installations: 20,000+
Google Tag Manager is an official plugin of Google. It refers to an incredibly powerful analytics/marketing tool that can do automatic marketing on various social platforms. You don’t have to be an analytics nerd to handle tracking code on your WordPress website.
This plugin allows you to add all Google and other third-party tags. It also makes your marketing process become more effective with no time wasted to add any tags.
#4 Metronet Tag Manager

Plugin Stats:
- Price: Free
- Rating: 4.7 stars
- Active Installations: 30,000+
You can easily integrate Google Tag Manager into your website with the Metronet Tag Manager plugin. It is a simple and easy-to-use plugin that is available whenever you need it. With the help of the plugin, you can effortlessly organize and streamline your tracking scripts.
When you don’t have the permission to add the code to the site, integrating Google Tag Manager will become a bit more complicated. It requires setting the rules up.
Metronet Tag Manager will be useful in this case. It unlocks other benefits and functions that allow you to create better scripts for your website.
#5 Really Simple Google Tag Manager
Plugin Stats:
- Price: Free
- Active Installations: 1,000+
Really Simple Google Tag Manager plugin assists in adding Google Tag Manager script to the theme code without coding. This makes it easier to enable or disable the tracking code.
You are able to add and update your own tags for conversion tracking, remarketing, site analytics, etc. It also helps you deploy Google and third-party tags more easily and quickly.
Install Google Tag Manager WordPress Like a Pro
With Google Tag Manager, you can manage, track, and deploy tags on your WordPress site in a single dashboard without any coding effort. Additionally, it aids in data collection to enhance your marketing initiatives.
Google Tag Manager can be configured manually or through the use of a plugin. We have recommended the 5 best Google Tag Manager plugins, we hope that you can find your favorite one.
We also have a number of other awesome guides you can use to get going. Take a look at our articles about SEO strategy for more useful information!
